

In my previously I mentioned potting and soil mixture. I will go into more depth on how this is done.
When do you know, it is time for your tree to be repotted? If you have a bonsai tree for more than two years and have never hear of it being repotted, it is most probably time for the tree to be repotted. There are other signs as well. If the tree starts to grow slower than usual, if the colour of the leaves turn light yellow (this may be of draught), if you water the tree and the water stays at on top of the soil for more than 10 seconds, if the roots are visible from the top and you can see large roots that look like they are circling around the inside of the pot. These are all signs that a tree in need of repotting. Please note that there are trees like Ficus’ that grow very rapidly and can be repotted every year on younger trees or every two years depending on the age and health of the tree. For trees like Pines and Cedars it may be advisable to only repot every three to four years.
Now you know when to repot. The next thing you need to know is when to repot. Most trees can be repotted in Spring (Mid-September). There are a few trees that prefer to be replanted before spring and some that can only be replanted in Summer (Late December to early January). The reason for this is: trees have different growth patterns and we try and get the trees just as their sap starts to flow and they come out of their dormancy. For trees like Celtis Africana (Witstink hout) it may be end of July to begin August all depending on the growth of the tree and the average temperature. Other trees like Ficus trees like to be repotted in warmer temperatures when they are at their peak.
We know when to do repotting now.
To get you started with repotting you need a few things: tools, soil mixture, pot and the most important a tree.
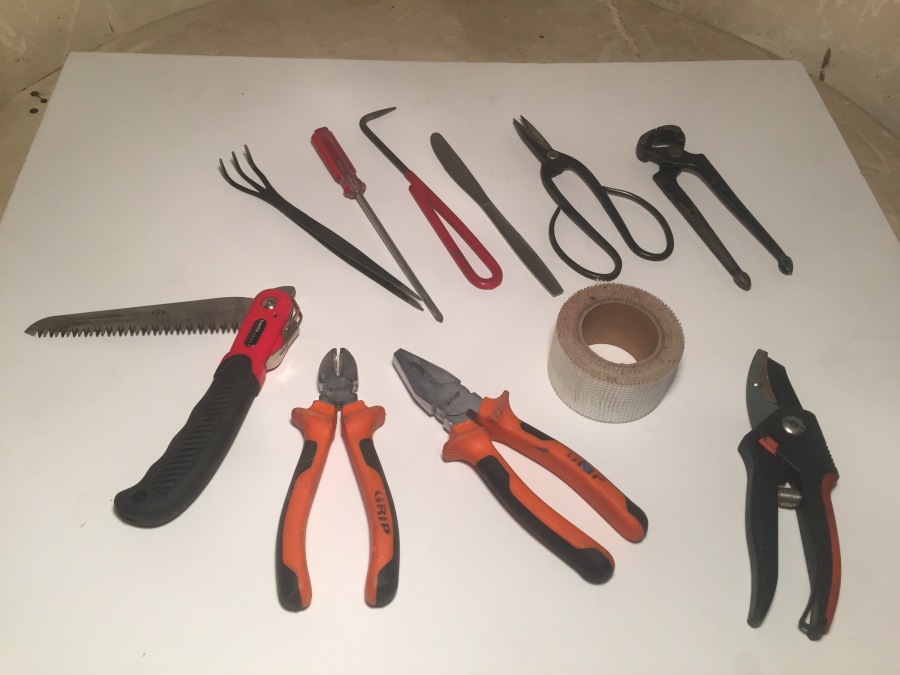
Tools
There are many fancy repotting gadgets out there but today I will only be mentioning the basic repotting tools. You will need a root hook, scissors, pruning scissors to cut roots, a hand saw for first time trees that have big bulky roots, chop stick, a knife to loosen the roots of the tree from the edge of the current pot, Pliers, wire cutters and mesh to cover the hole at the bottom of the bonsai pot.
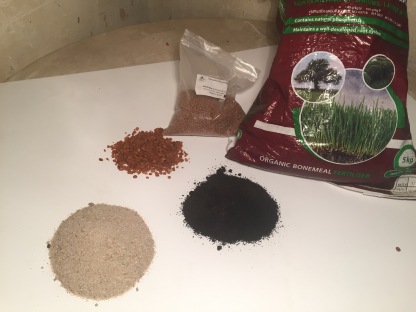
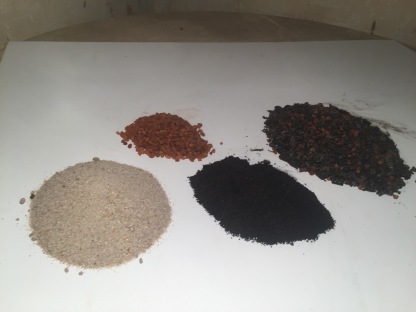
Soil Mixture
As mentioned in my previous blog I use a soil mix of 6 parts sieved potting soil, 3 parts stone 3mm – 5mm, 1 part river sand, 0,1-part bone meal and 5ml of multicote slow release fertilizer.
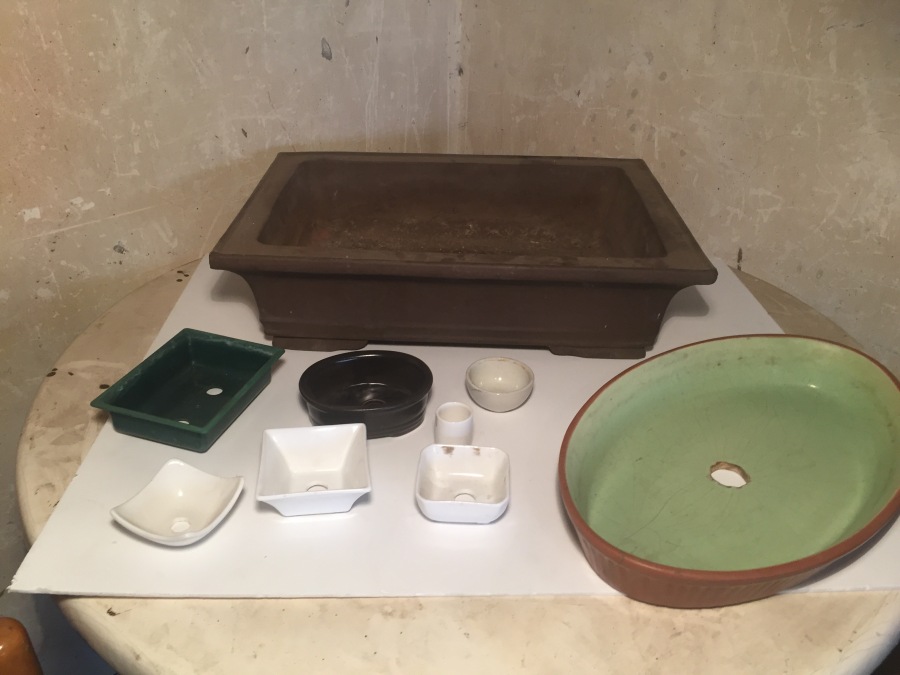
Pots
There are a few pots that you can choose from. That is entirely up to you. Undeveloped trees you may want to plant in specialized training pots or seedling trays. Partly developed tree may go into cheap bonsai pots and well developed bonsai into Japanese pots. These pots have a few things in common but the one that I wish to mention is that they all have holes in the bottom for water to drain out of as well as allow air to enter the soil mixture as this is just as important as water.
The tree
Some trees have out grown their old pots where other will be planted in bonsai pots for the first time. Now keep in mind that the type of pot you choose is up to you. There are guidelines as to how to choose pots based on the design of the tree. That is a discussion for another time as there are a few books on that topic alone. The basic rule is that the thickness of the trees trunk determines the depth of the pot, the width of the pot is determined by the width of the tree (if the tree is 30cm the pot can be 40cm which is a third bigger that the tree or 20cm which is a third smaller that the tree). The style of the pot is also determined by the style of the tree (square or rectangular pot for strong male like tree, round/curved or oval pot for soft feminine tree).
Potting
If you have tick all the above-mentioned boxes, we are half way there. Then potting or repotting a tree please make sure that you have everything you need ready and close to you. This makes it better for the tree, as potting is a stressful time for the tree. The quicker you do it the more chance of success you have.
If you are using the same pot it will be advisable to have a bucket of water close by. What you would need to do is remove the tree from the pot and quickly wipe the inside of the pot with a wet piece of cloth. The next thing to do will be to cover the hole at the bottom of the pot with mesh to keep the soil from washing out and keep slugs/pest out.
You will then need to cover the bottom part of the pot with you pre-mixed soil. You can you use your root hook to remove soil from the sides of the trees root ball as well as the bottom. After you have done this you will be able to see which roots are feeder roots (small white or yellowish roots) and which roots (large long tangling roots) are just there to full space and anchor the tree. You can remove the long roots; just keep in mind you do not want to remove more than a third of the root ball mass.
Now you can place the tree back into the pot on top of the layer of soil you filled the pot with. Tie you tree to the pot with wire through the holes at the bottom of the pot. Add more soil to the pot and work it in between the roots with a chop stick. Be gentle as you do not want to damage roots. Use a circular motion as this will allow more soil to move into the gaps between the roots. After you filled the entire pot. Flatten the soil mixture and allow about 1cm between the edge of the pot and the top of the soil for watering. You can add a layer of small stones on top of the soil mixture. This finishes of the tree nicely and keeps soil moist as the sun does not shine directly on the soil.
After care
Place the newly potted tree in a shaded area that is protected against strong wind. The tree needs to rest. New roots will form, but if disturbed the proses will take longer. Leave the tree in this area for a two-week period. After this you can gradually move the tree to it previous position. Do not fertilize the tree for the next 6 weeks.
Hope this was insightful. If you have any comments or questions, please leave me a message below.

Reblogged this on Wolf's Birding and Bonsai Blog.
LikeLike