
Today I ventured into new territory. I styled a small Stone Pine and removed wire from a stone pine that I applied a year ago. As most of you know getting a Japanese black, red of white pine can be difficult or expensive to buy. So I decided to use the pines that are found in our region.
The pine trees found in the Western Cape, South Africa are called Kroonden by the natives but it’s known as stone pine or by the botanical name Pinus pinea. According to wikipedia urban legend has it that these trees were planted by the French Huguenot refugees who settled at the Cape of Good Hope during the late 17th century and brought the seeds with them from France. If you have been to the Western Cape and saw the amount of pines in this region it’s hard to think that they where introduced but the French Huguenots. They are everywhere. Then to add another turn to this story they are now sold by nurseries as indigenous trees.
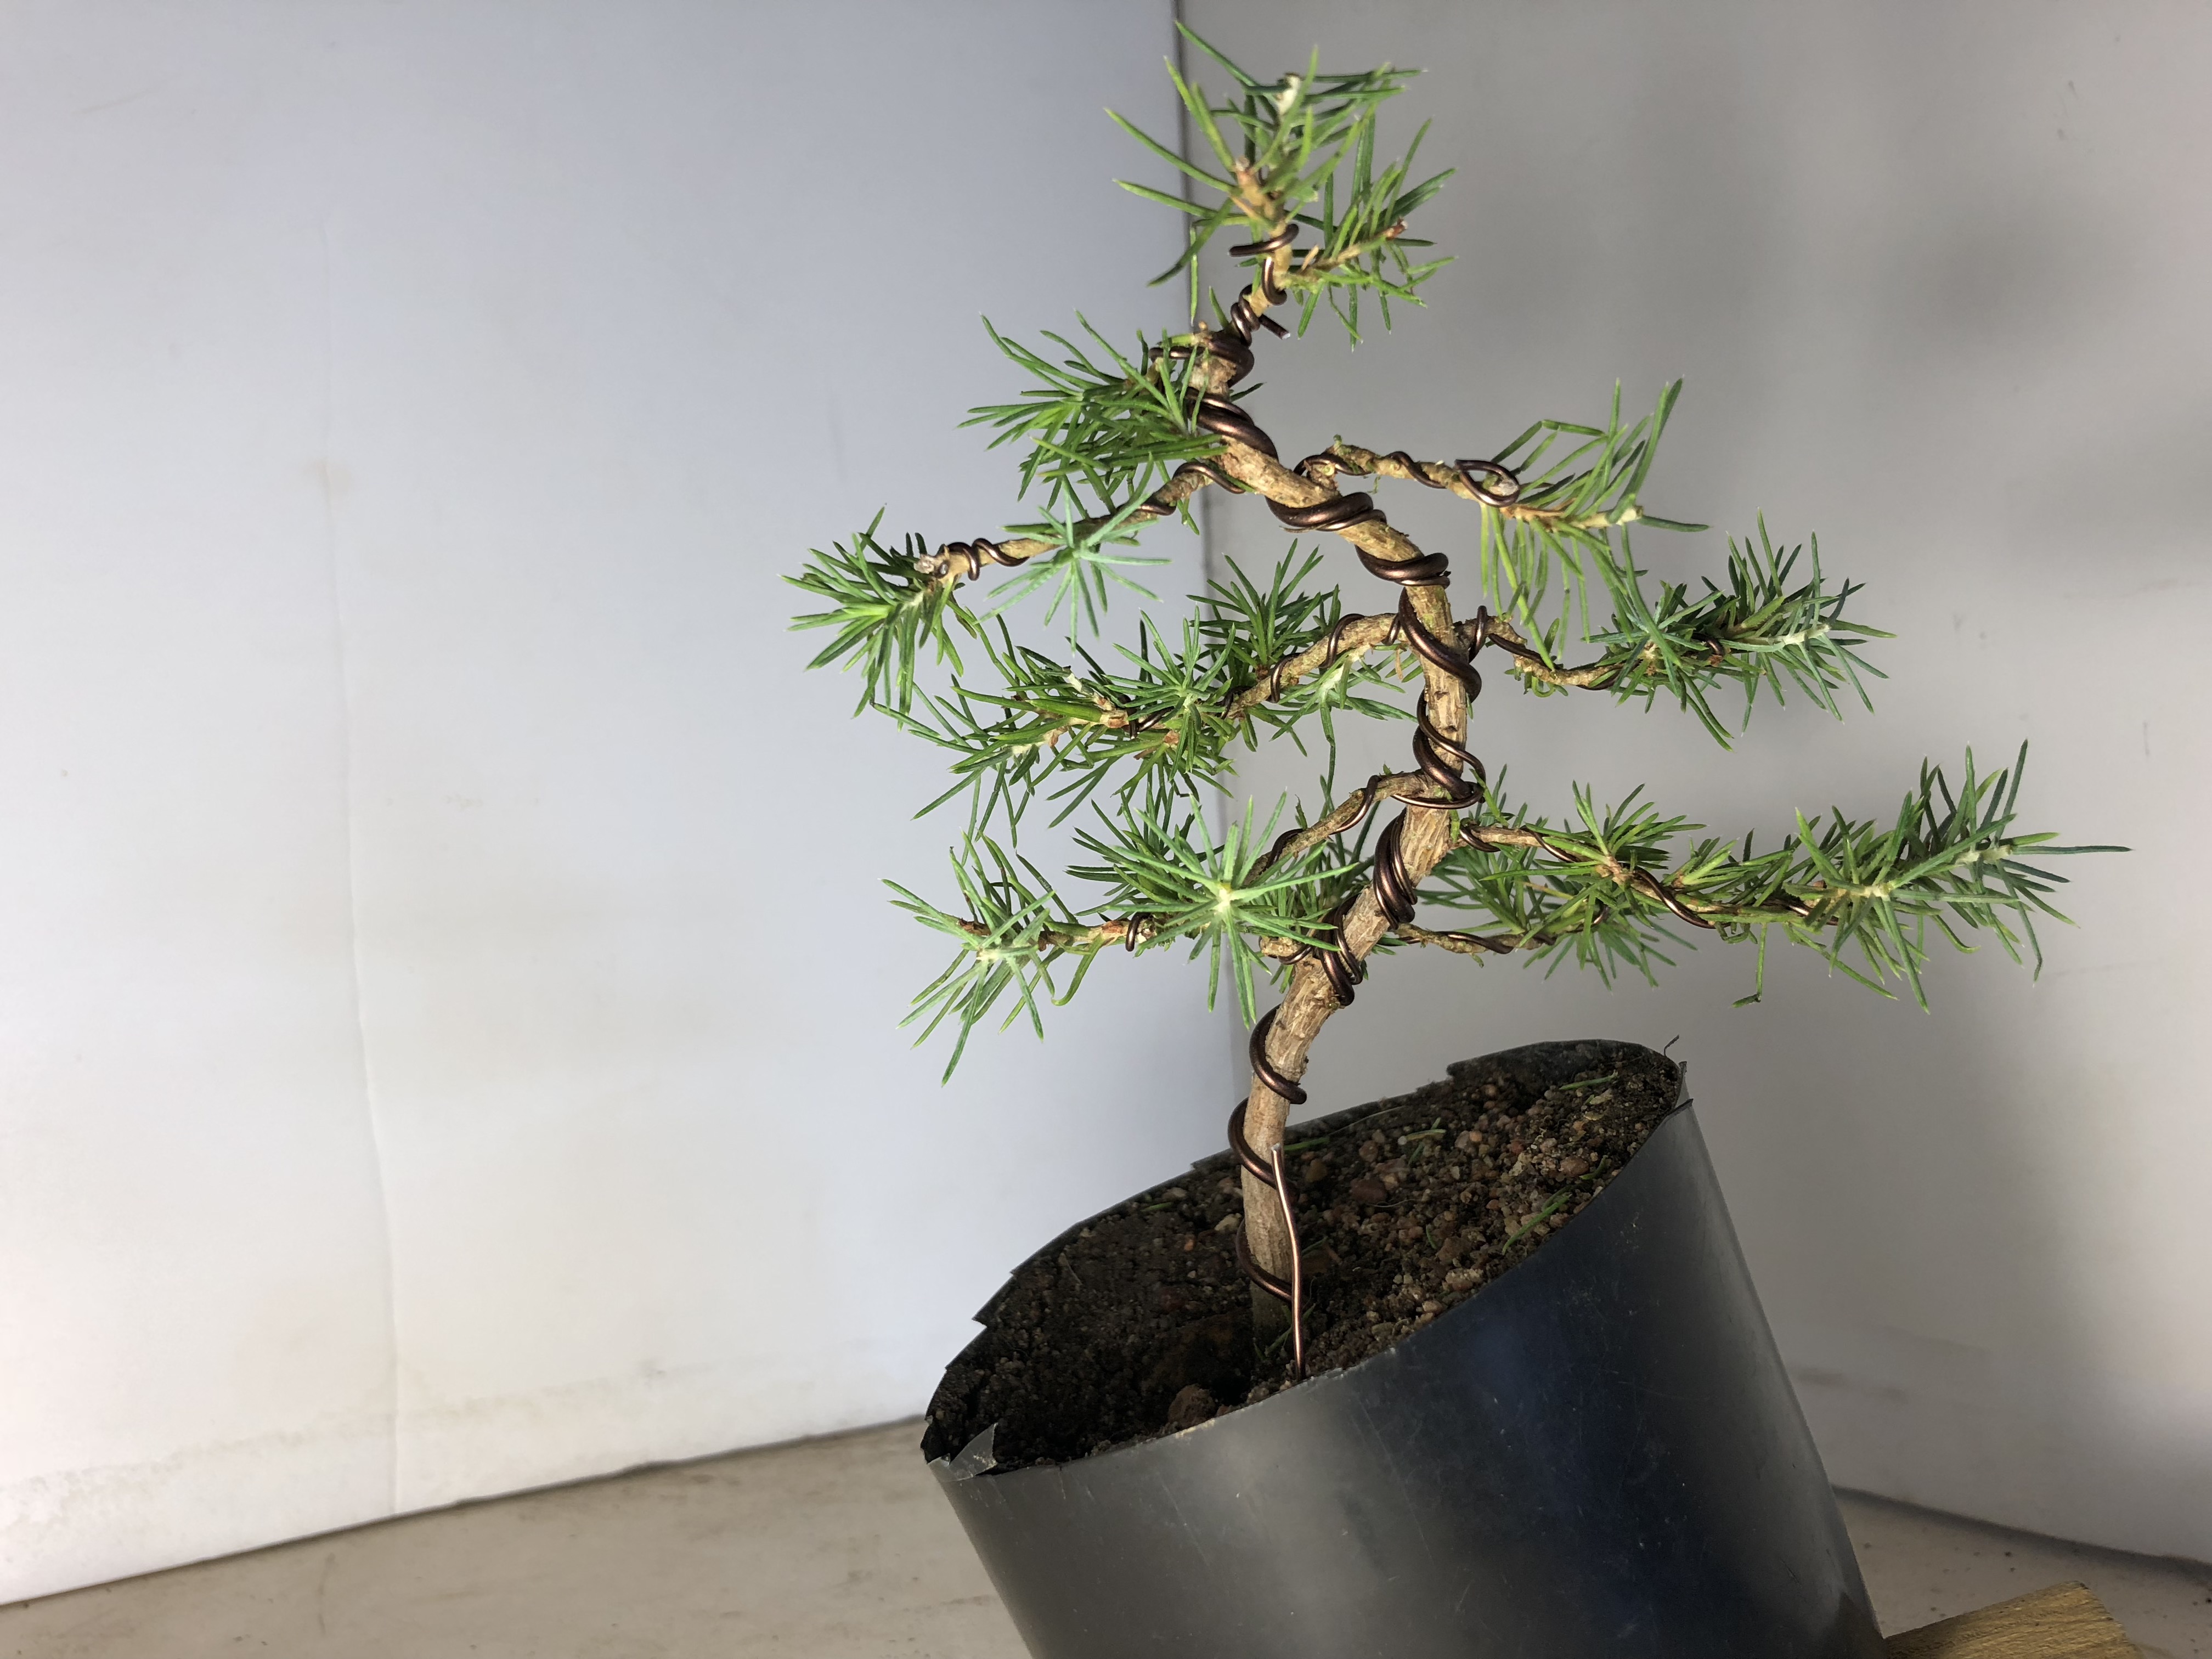
I bought two of these pines about two year ago from a small government nursery about one and a half hours drive from where I live. I wired the one and the other one I felt just to grow out. I trim the tree regularly to keep the foliage as compact as possible. These are all young trees as I have only seen juvenile growth on them. Here is a photo of the tree that I removed the wire from that was applied about a year ago.

As you can see I used a few of my own special techniques to bend the tree in shape. Some one asked me the other day if this is some kind of torture technique. I might look like that but I assure you that the utmost care was taken when applying these wires and accessories to this tree. Here is a photo after I removed the wire.
I am happy with the results of this tree. If you look carefully at the bottom left of the tree you will see that the first branch did not set in the right place so I will need to rewire this branch. I will allow the tree to rest for a few months before I wire the branch in place.
The tree that I wanted to get to is a small stone pine that I got from my nephew last year as a gift. He also has a love for bonsai. He grows pines from seeds. He gave me two pine trees in little black plastic pots. I have been trimming them and feeding them. Today I was so tempted to work on one of them I just could not stop myself. I always get two of the same tree species. I would then work on the one and leave the other one to grow out. This way I can monitor the tree and see if it responds well to the techniques I apply to the tree.
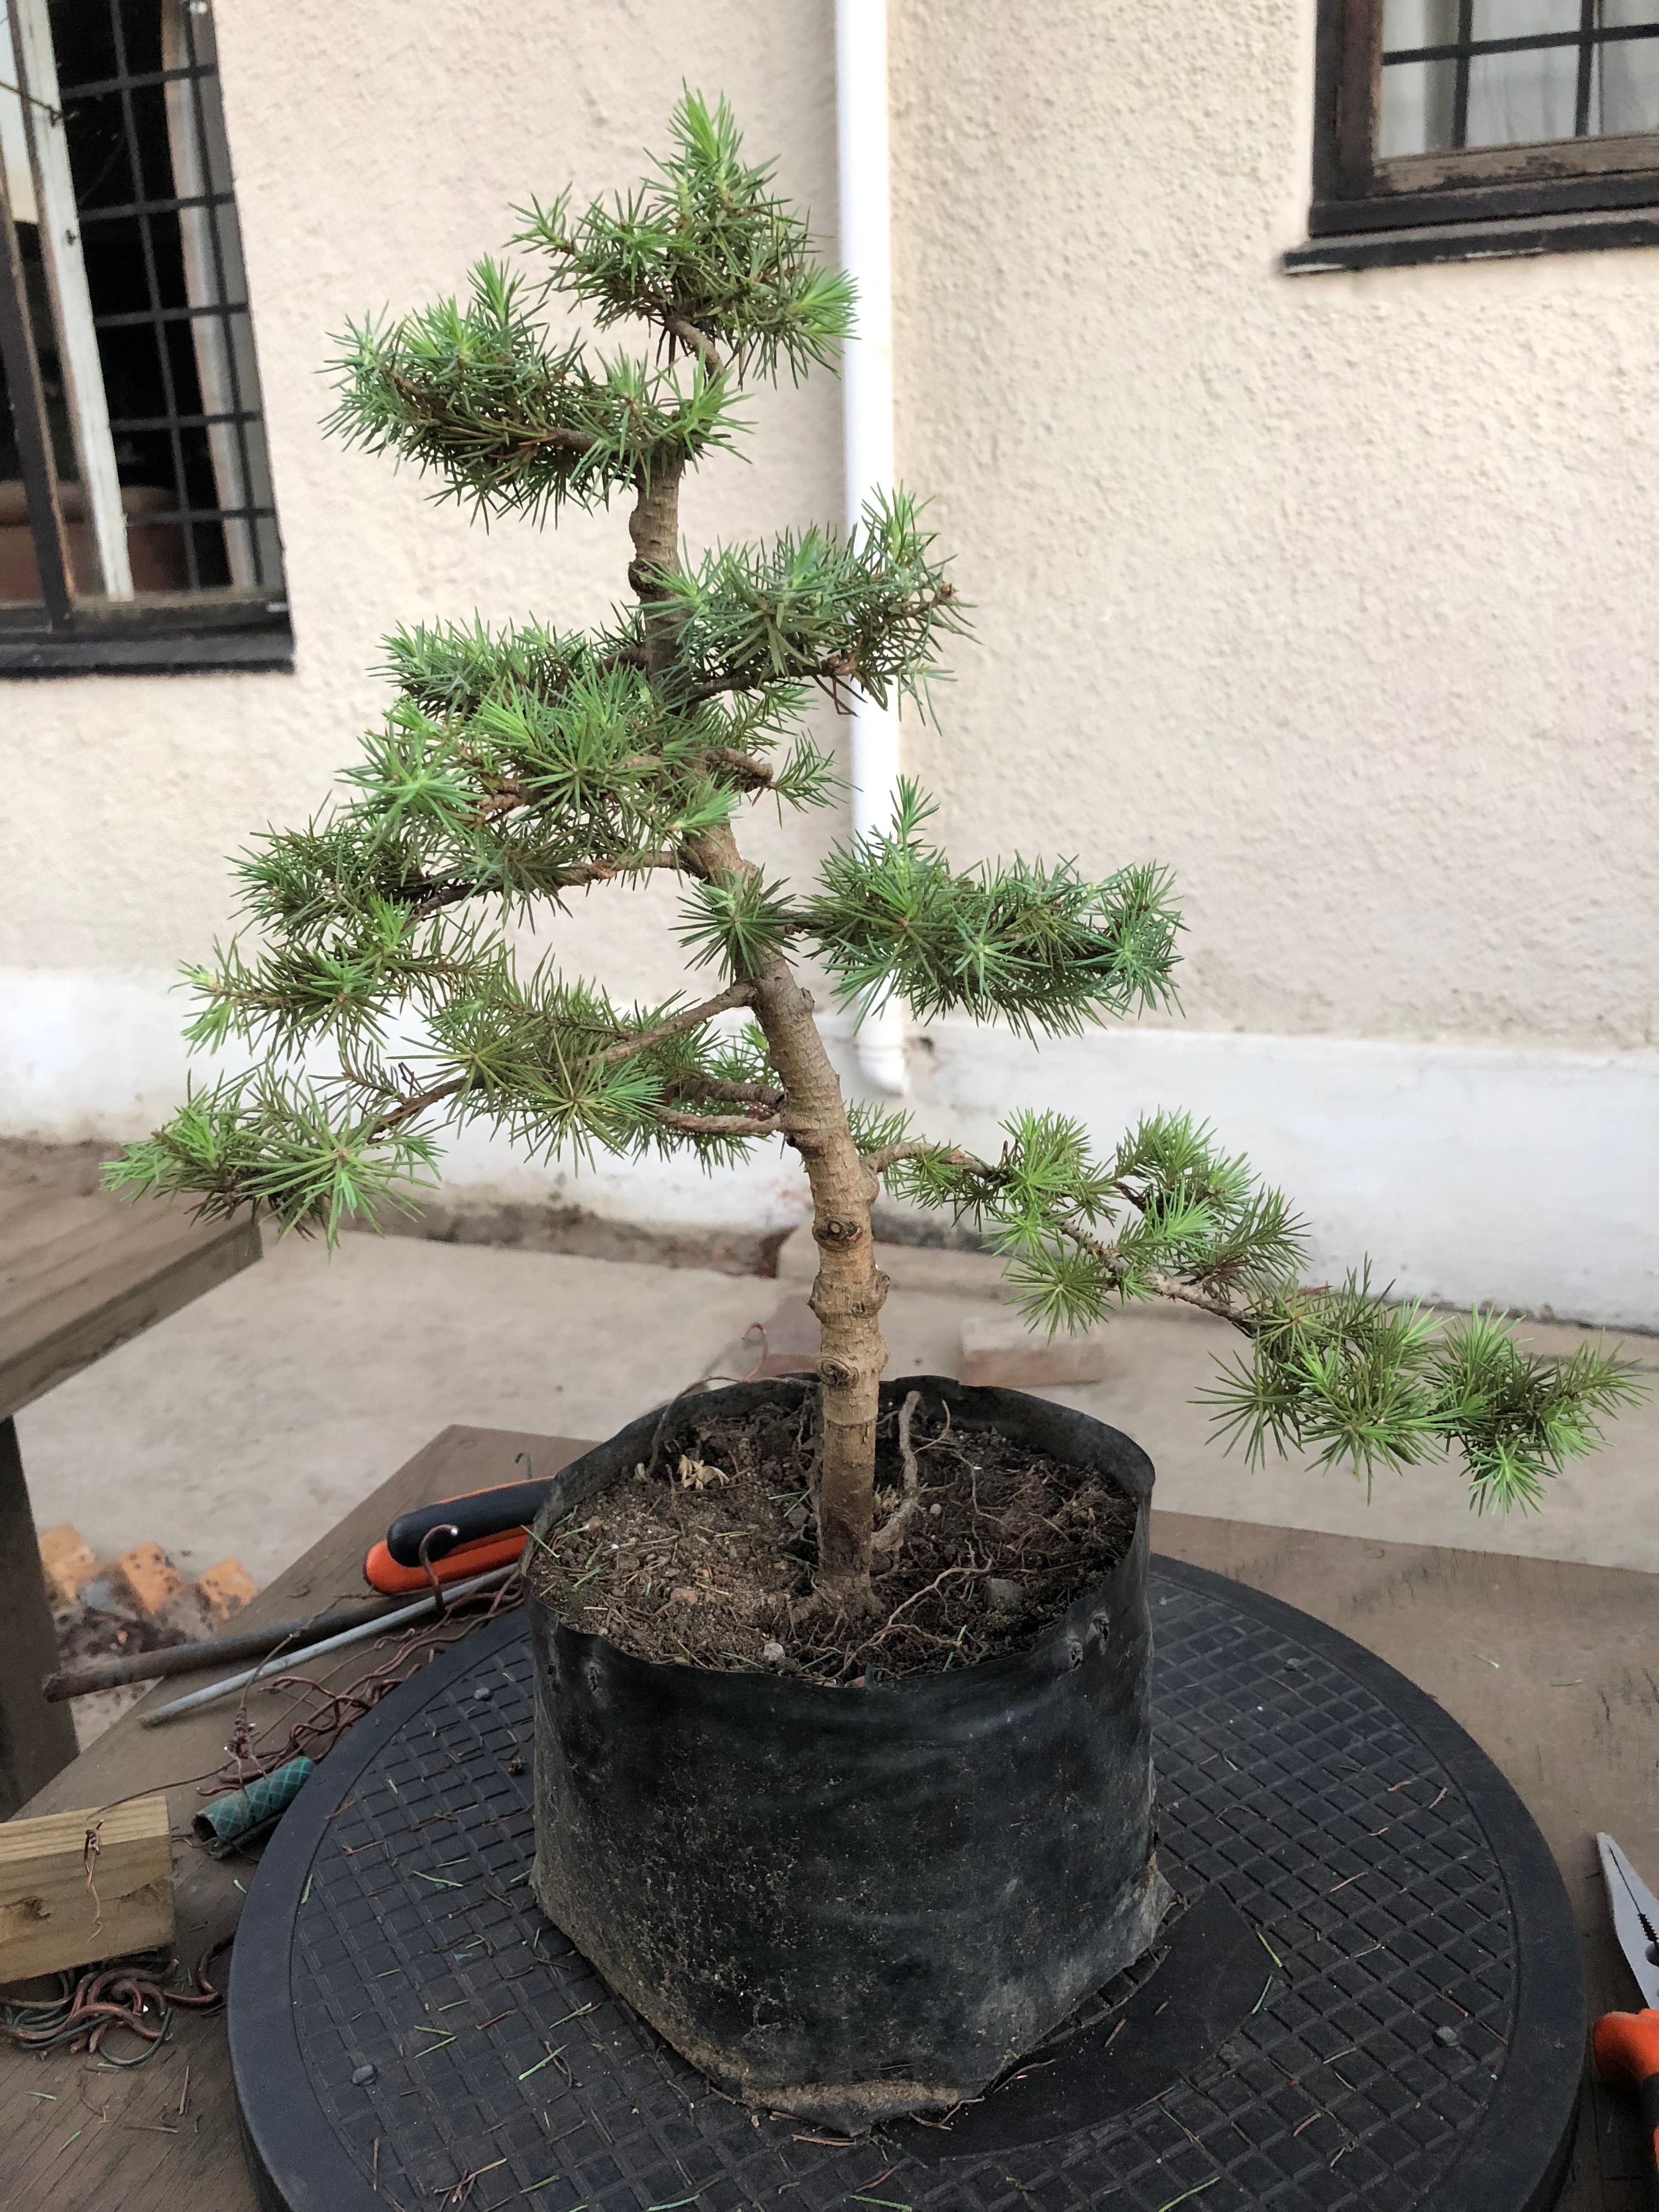
Here is a photo of the tree before I started working on it.
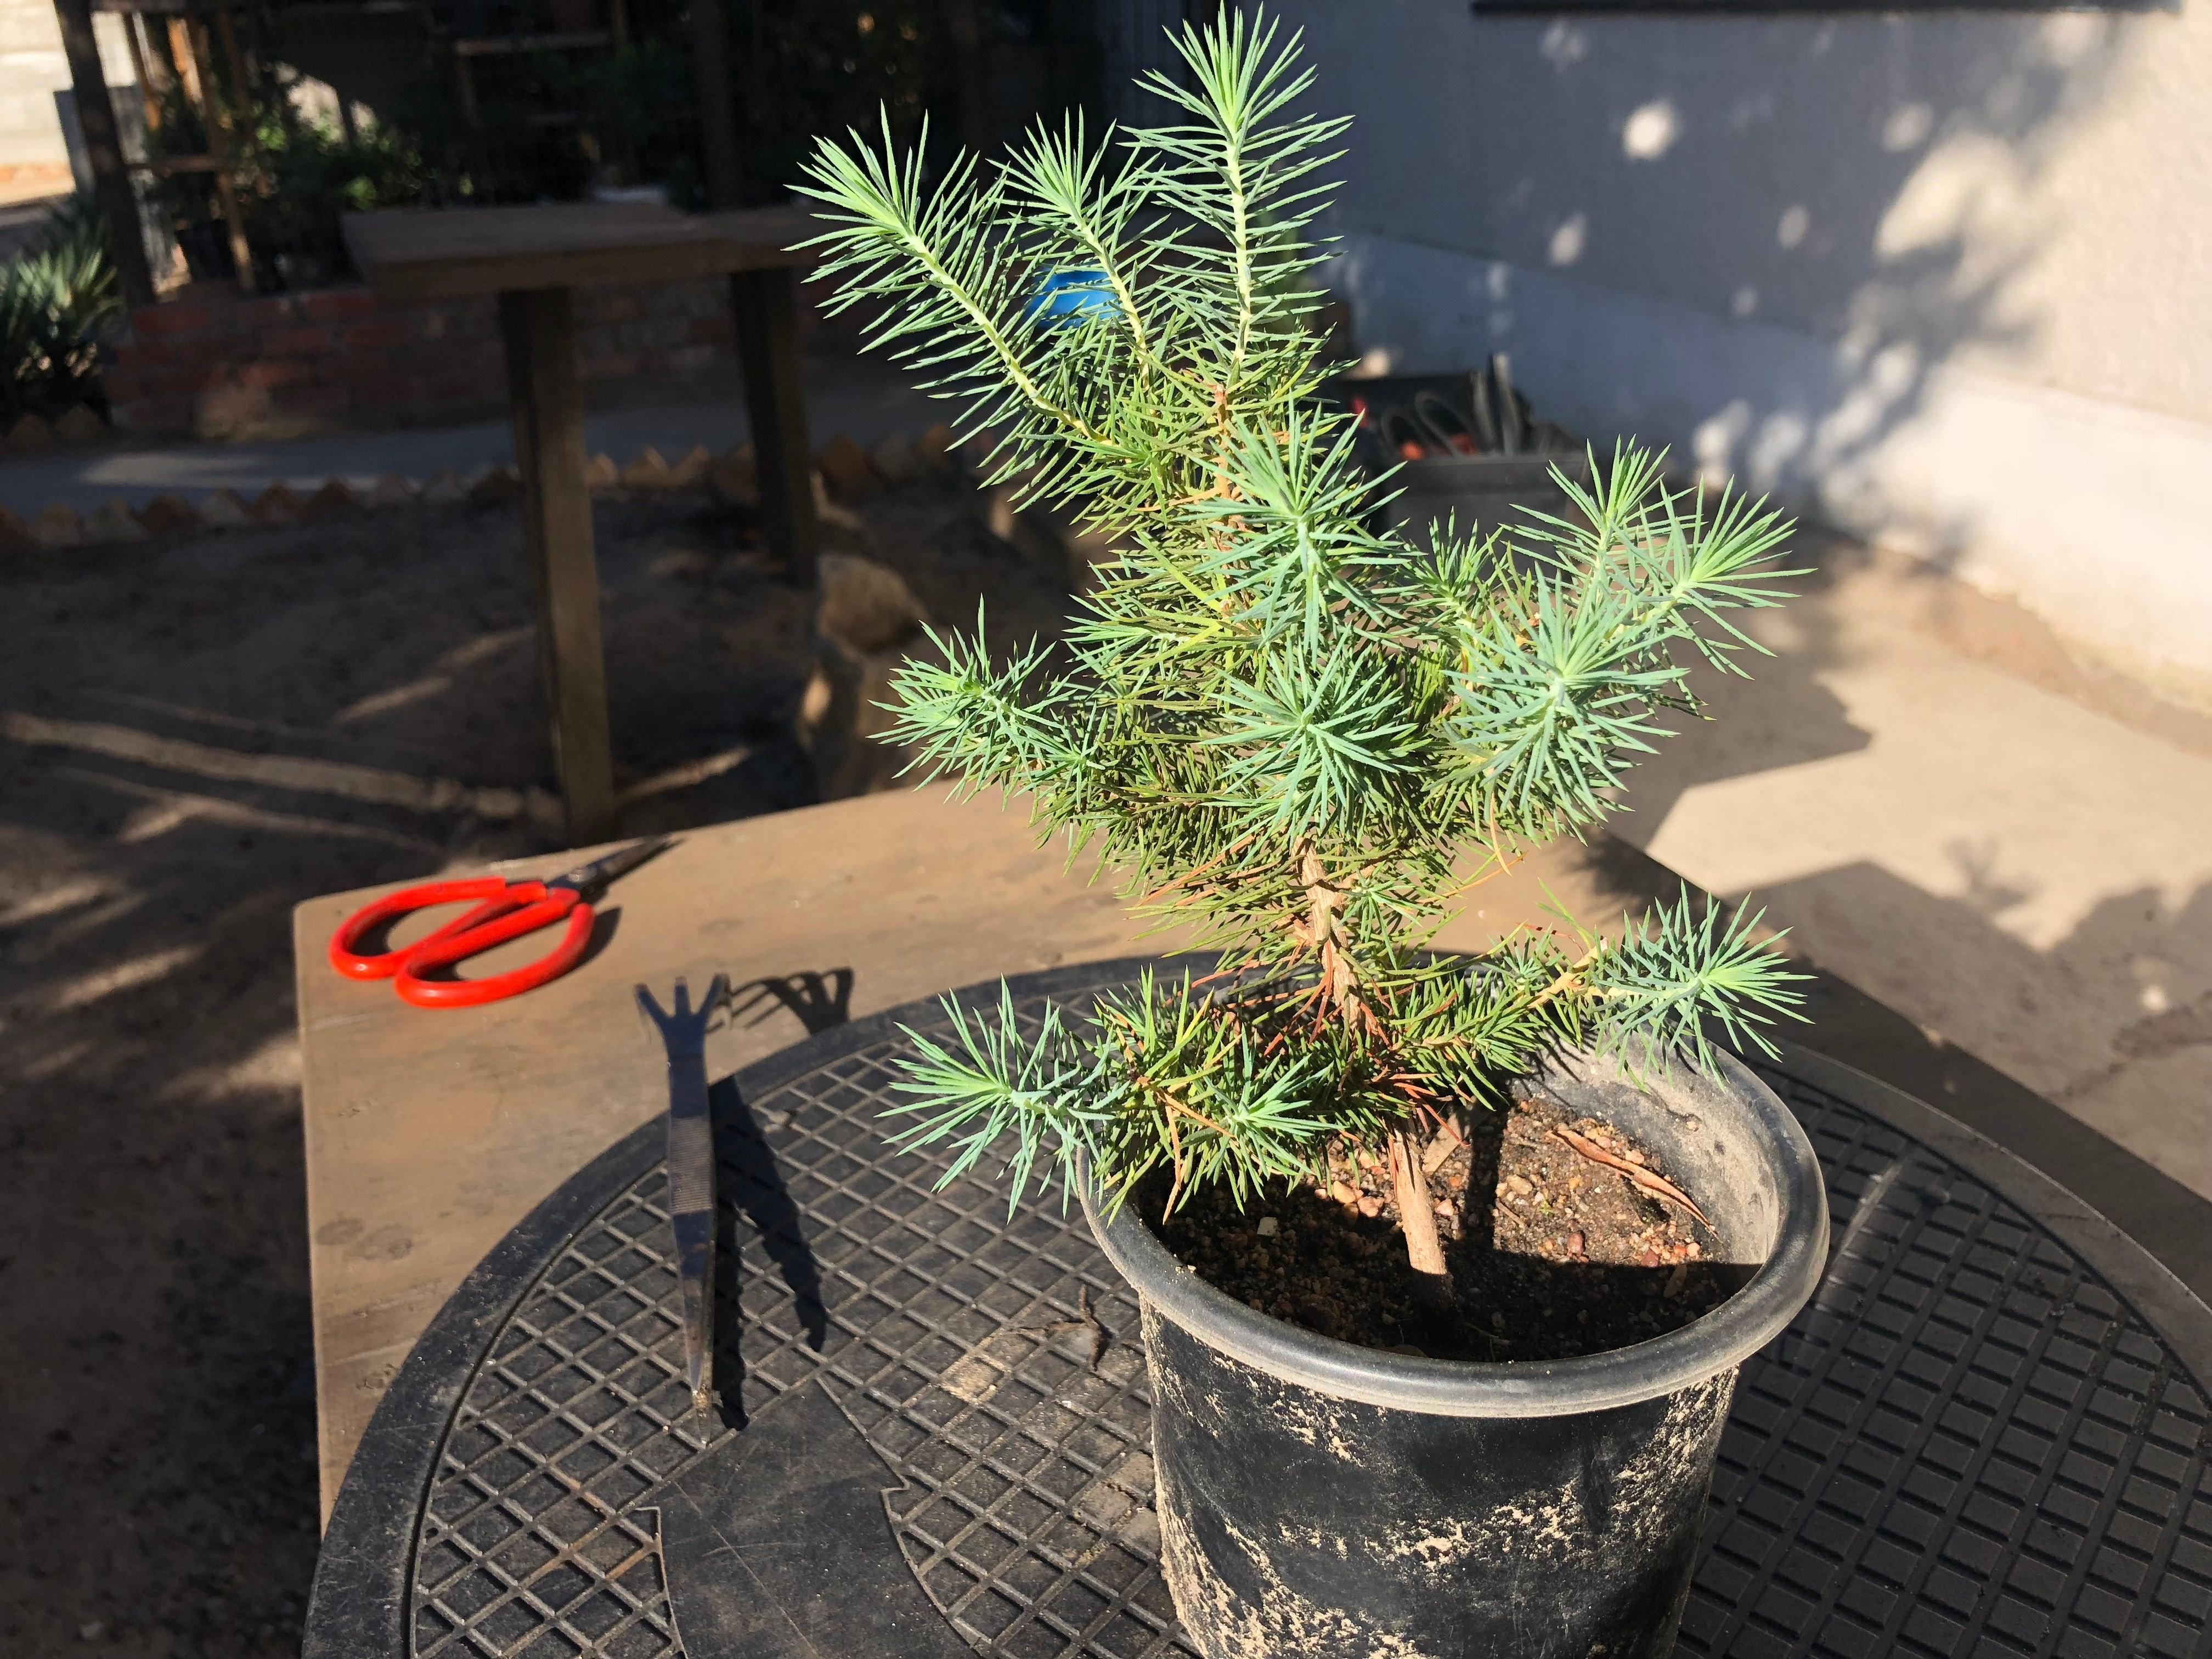
As you can see it is a very small tree. It’s about 15cm high. I then started to remove some of the dead and older needles from the trunk and the base of the branches to make applying wire easier. I know that it is not good to remove all the old needles from the tree as it needs the needles to stay healthy. As you know by now I’m not one to follow rules as I call them guidelines and that makes me sleep better at night if I think of it that way. I like to experiment and push trees to their limits. If I fail then at lest I know why it happened. If I succeed well then all the credit is mine. Here is a photo of the tree with the needles removed.
I removed these needles with a pair of tweezers very carefully trying not to damage the bark on the tree. Took me a few minutes to get this done. Next I started to apply wires to the trunk of the tree. To my surprise I only needed a 2mm aluminum wire for this.

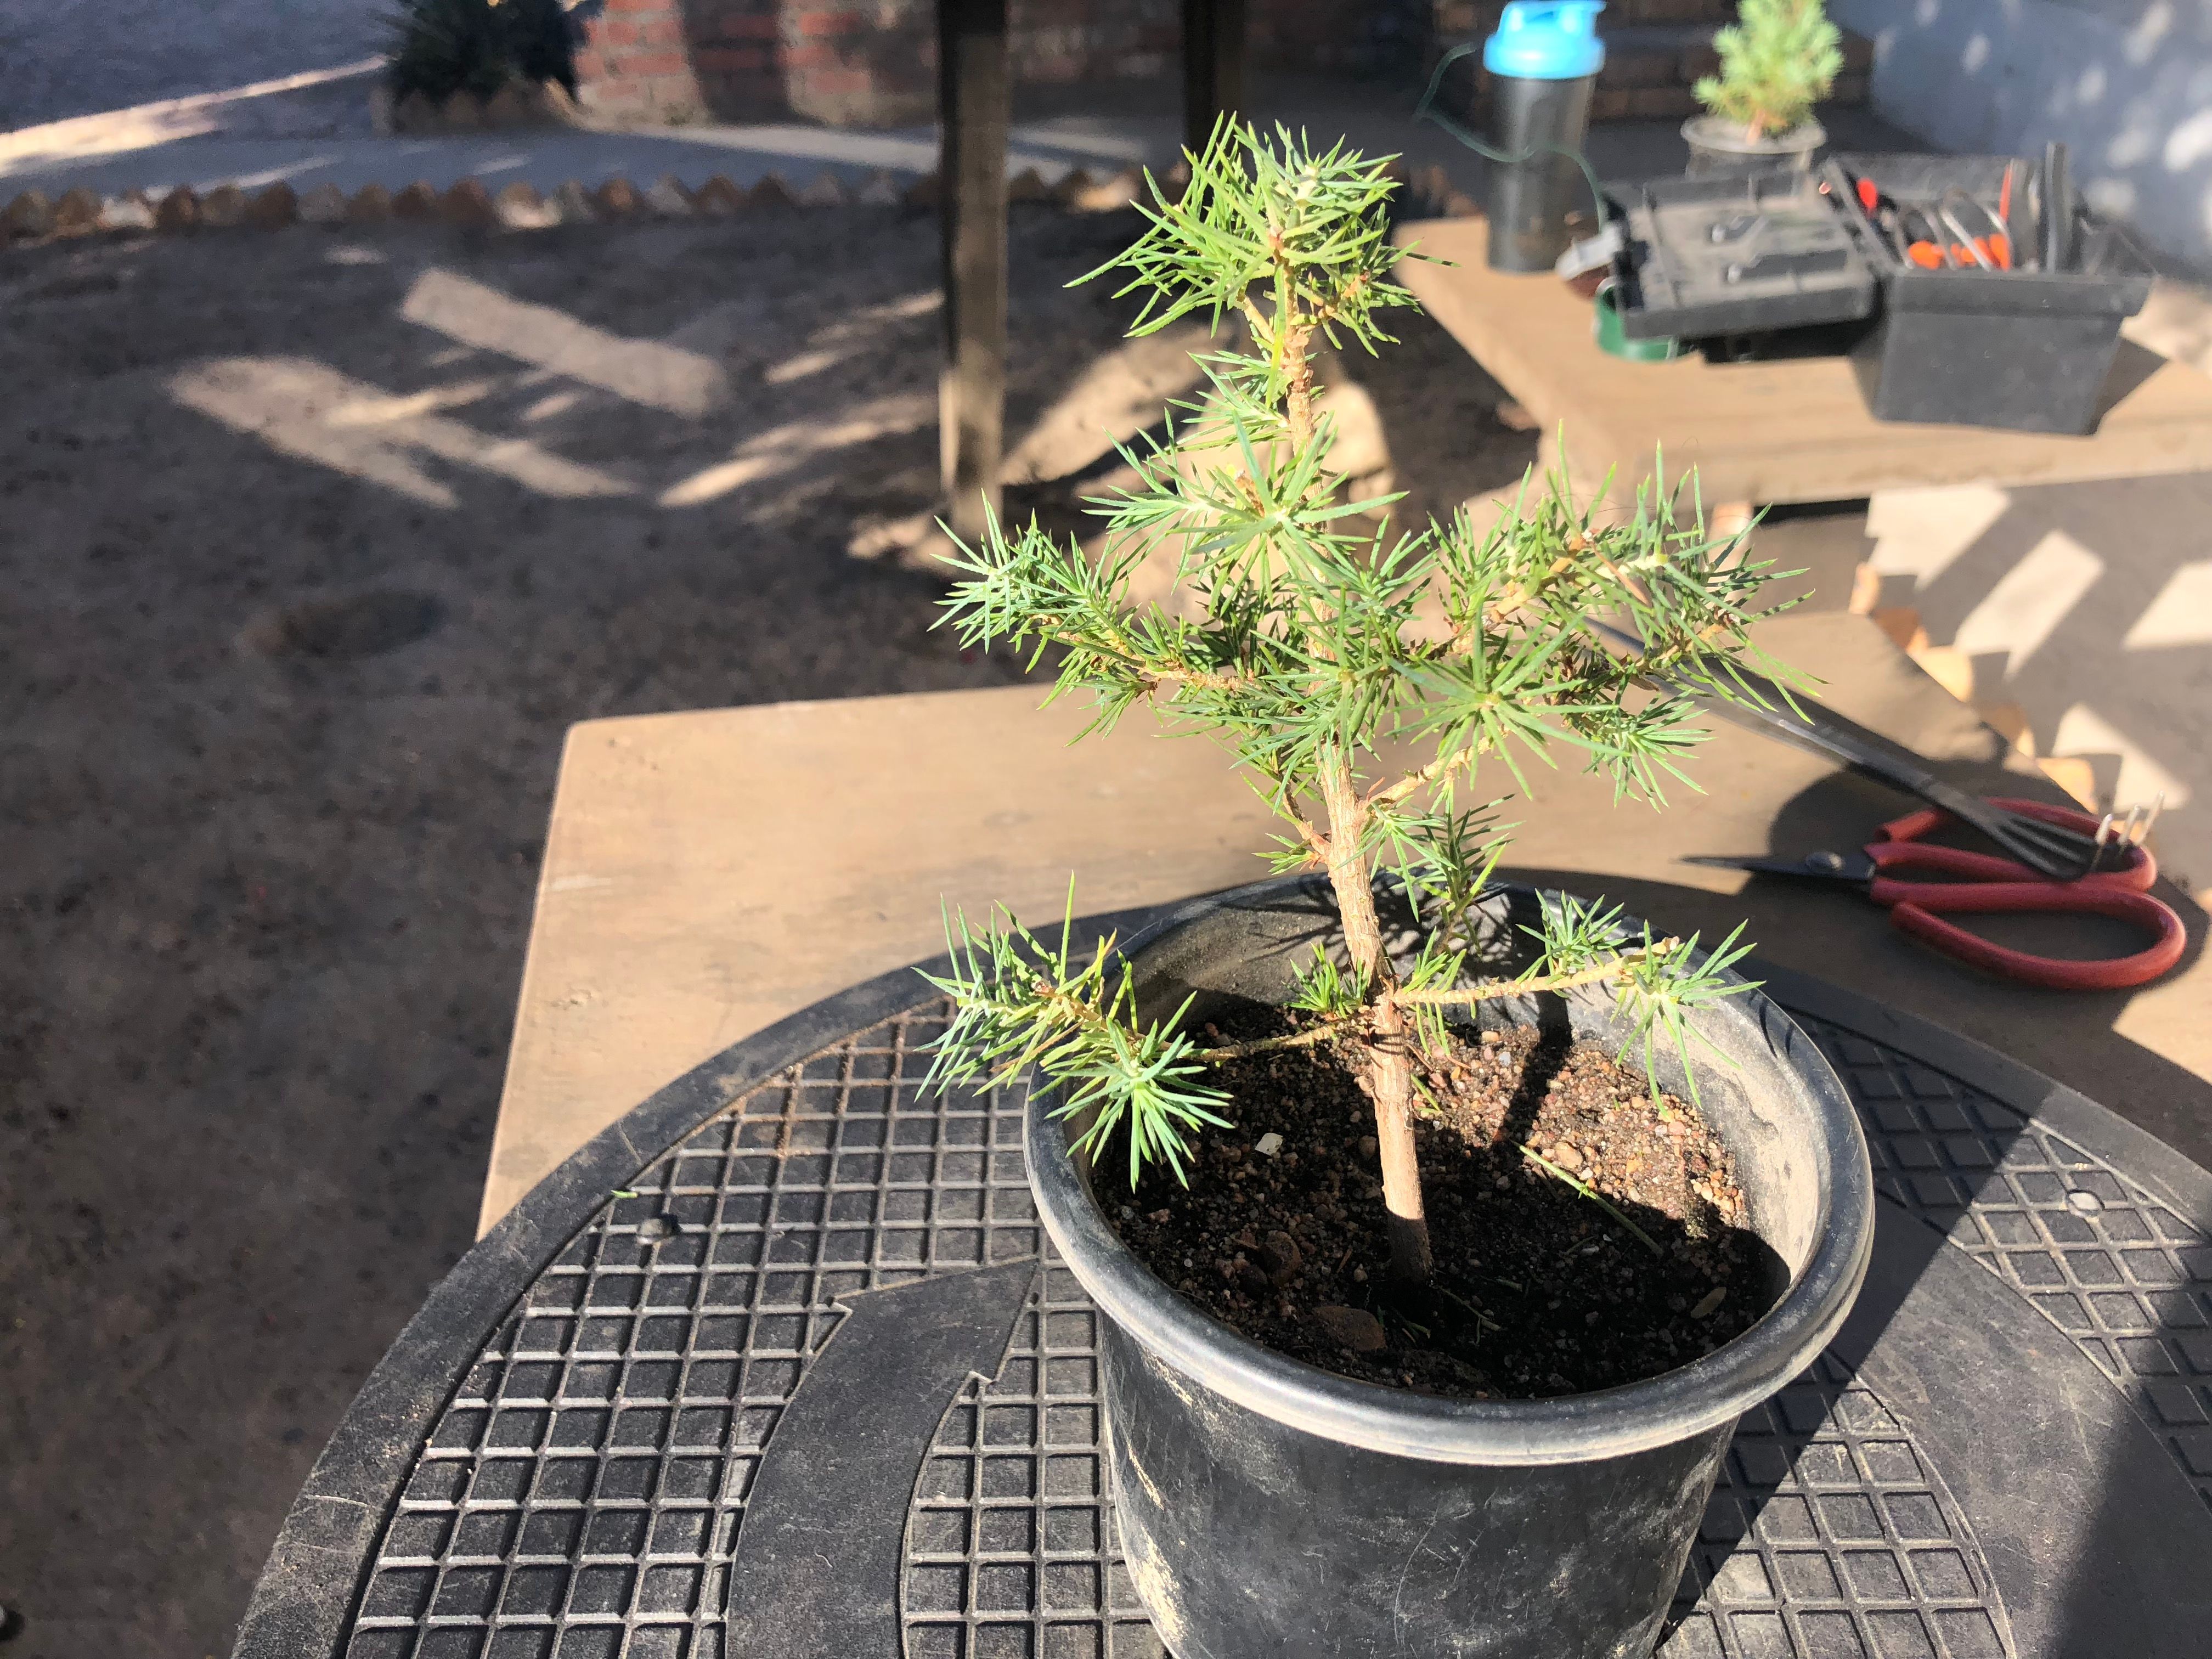
I then started to wire the rest of the tree one branche at a time. Slowly making my way up the tree. After I wired all the branches I had another look at the tree. I only needed to remove one branch from this tree to make a nice shohin size bonsai. I then placed all the branches. Some of the branches still need to grow a bit longer to fit the place they are in perfectly but for now I’m happy with the out come.
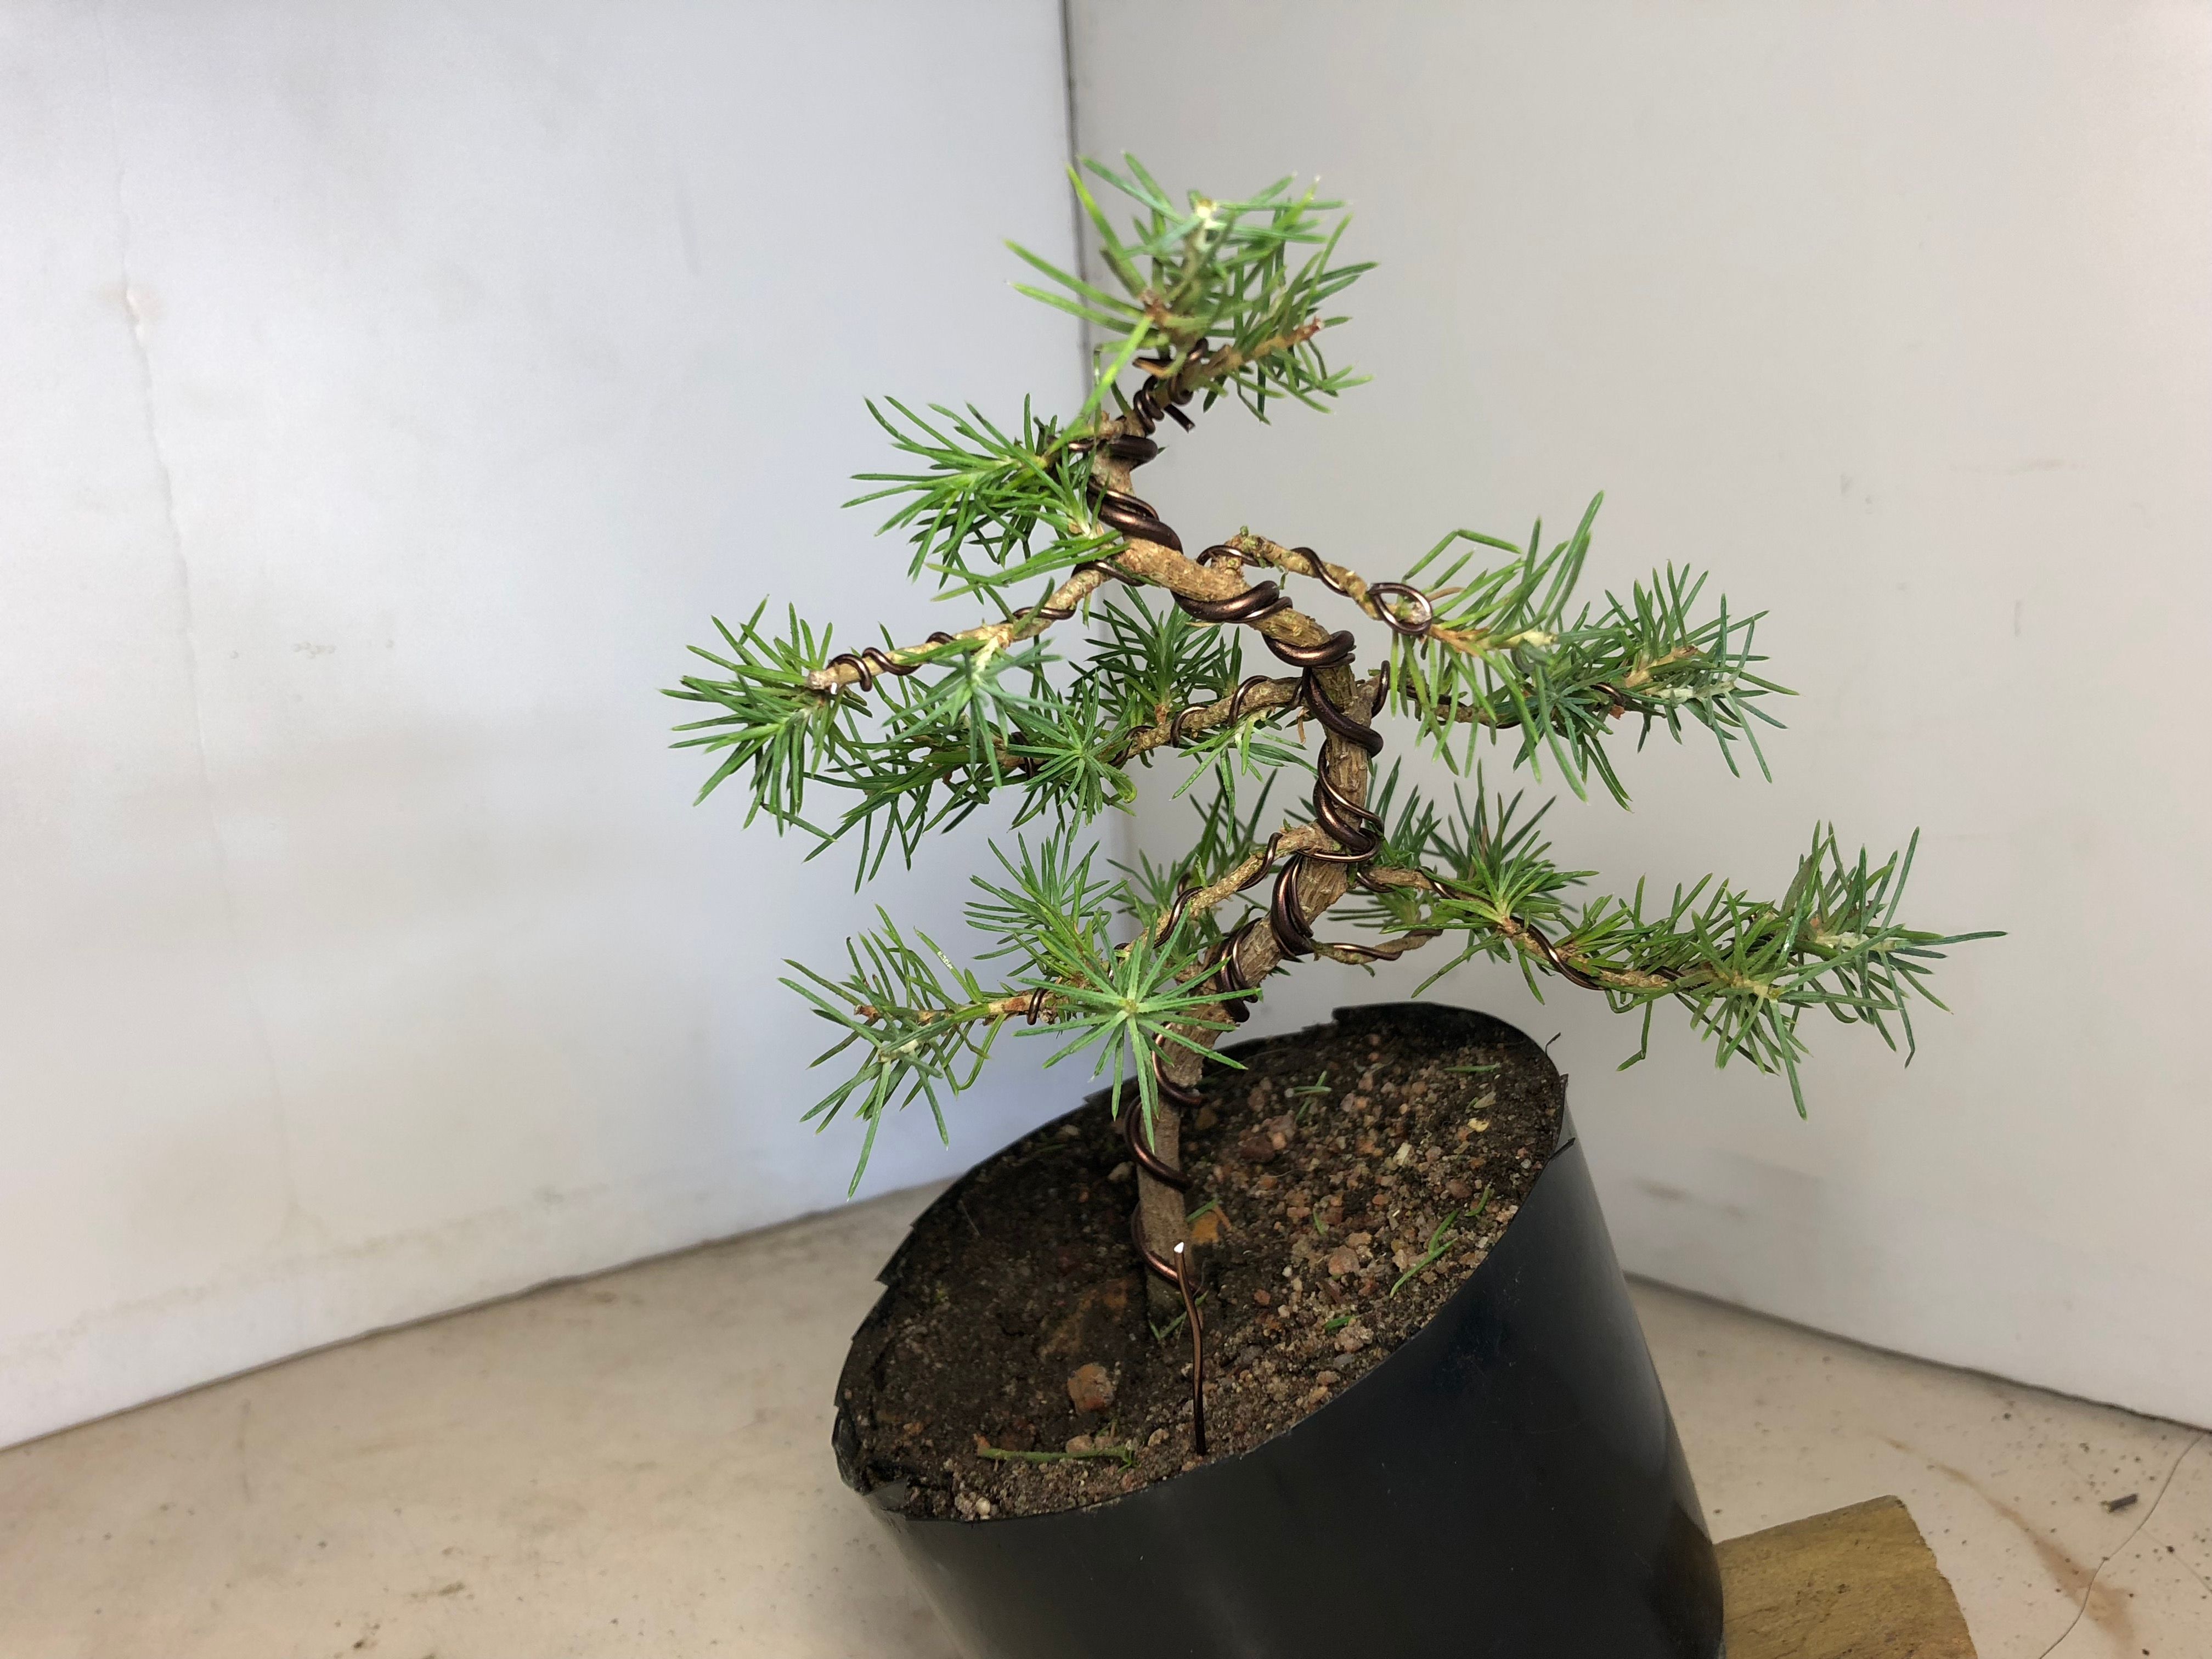
In the photo above you can see the finished tree. I tilled the tree to the left and then bent the trunk to create some movement in the tree. I then tried my best to get all the branches on the out side curve of each bend. The reason for this is simple in nature branches do not grow on the inside of the curve as the bark on that side of the bend compresses and kills the branches that tend to grow there. The sap flows freely on the outside of the curve therefor branches there get more growth.
I then formed four levels of branches. Each level having a left, right and a back branch except the last level at the top. It has a left, right and the three branches that forms the apex of the tree.
Here is a top view of the tree to illustrate the placement of the branches.
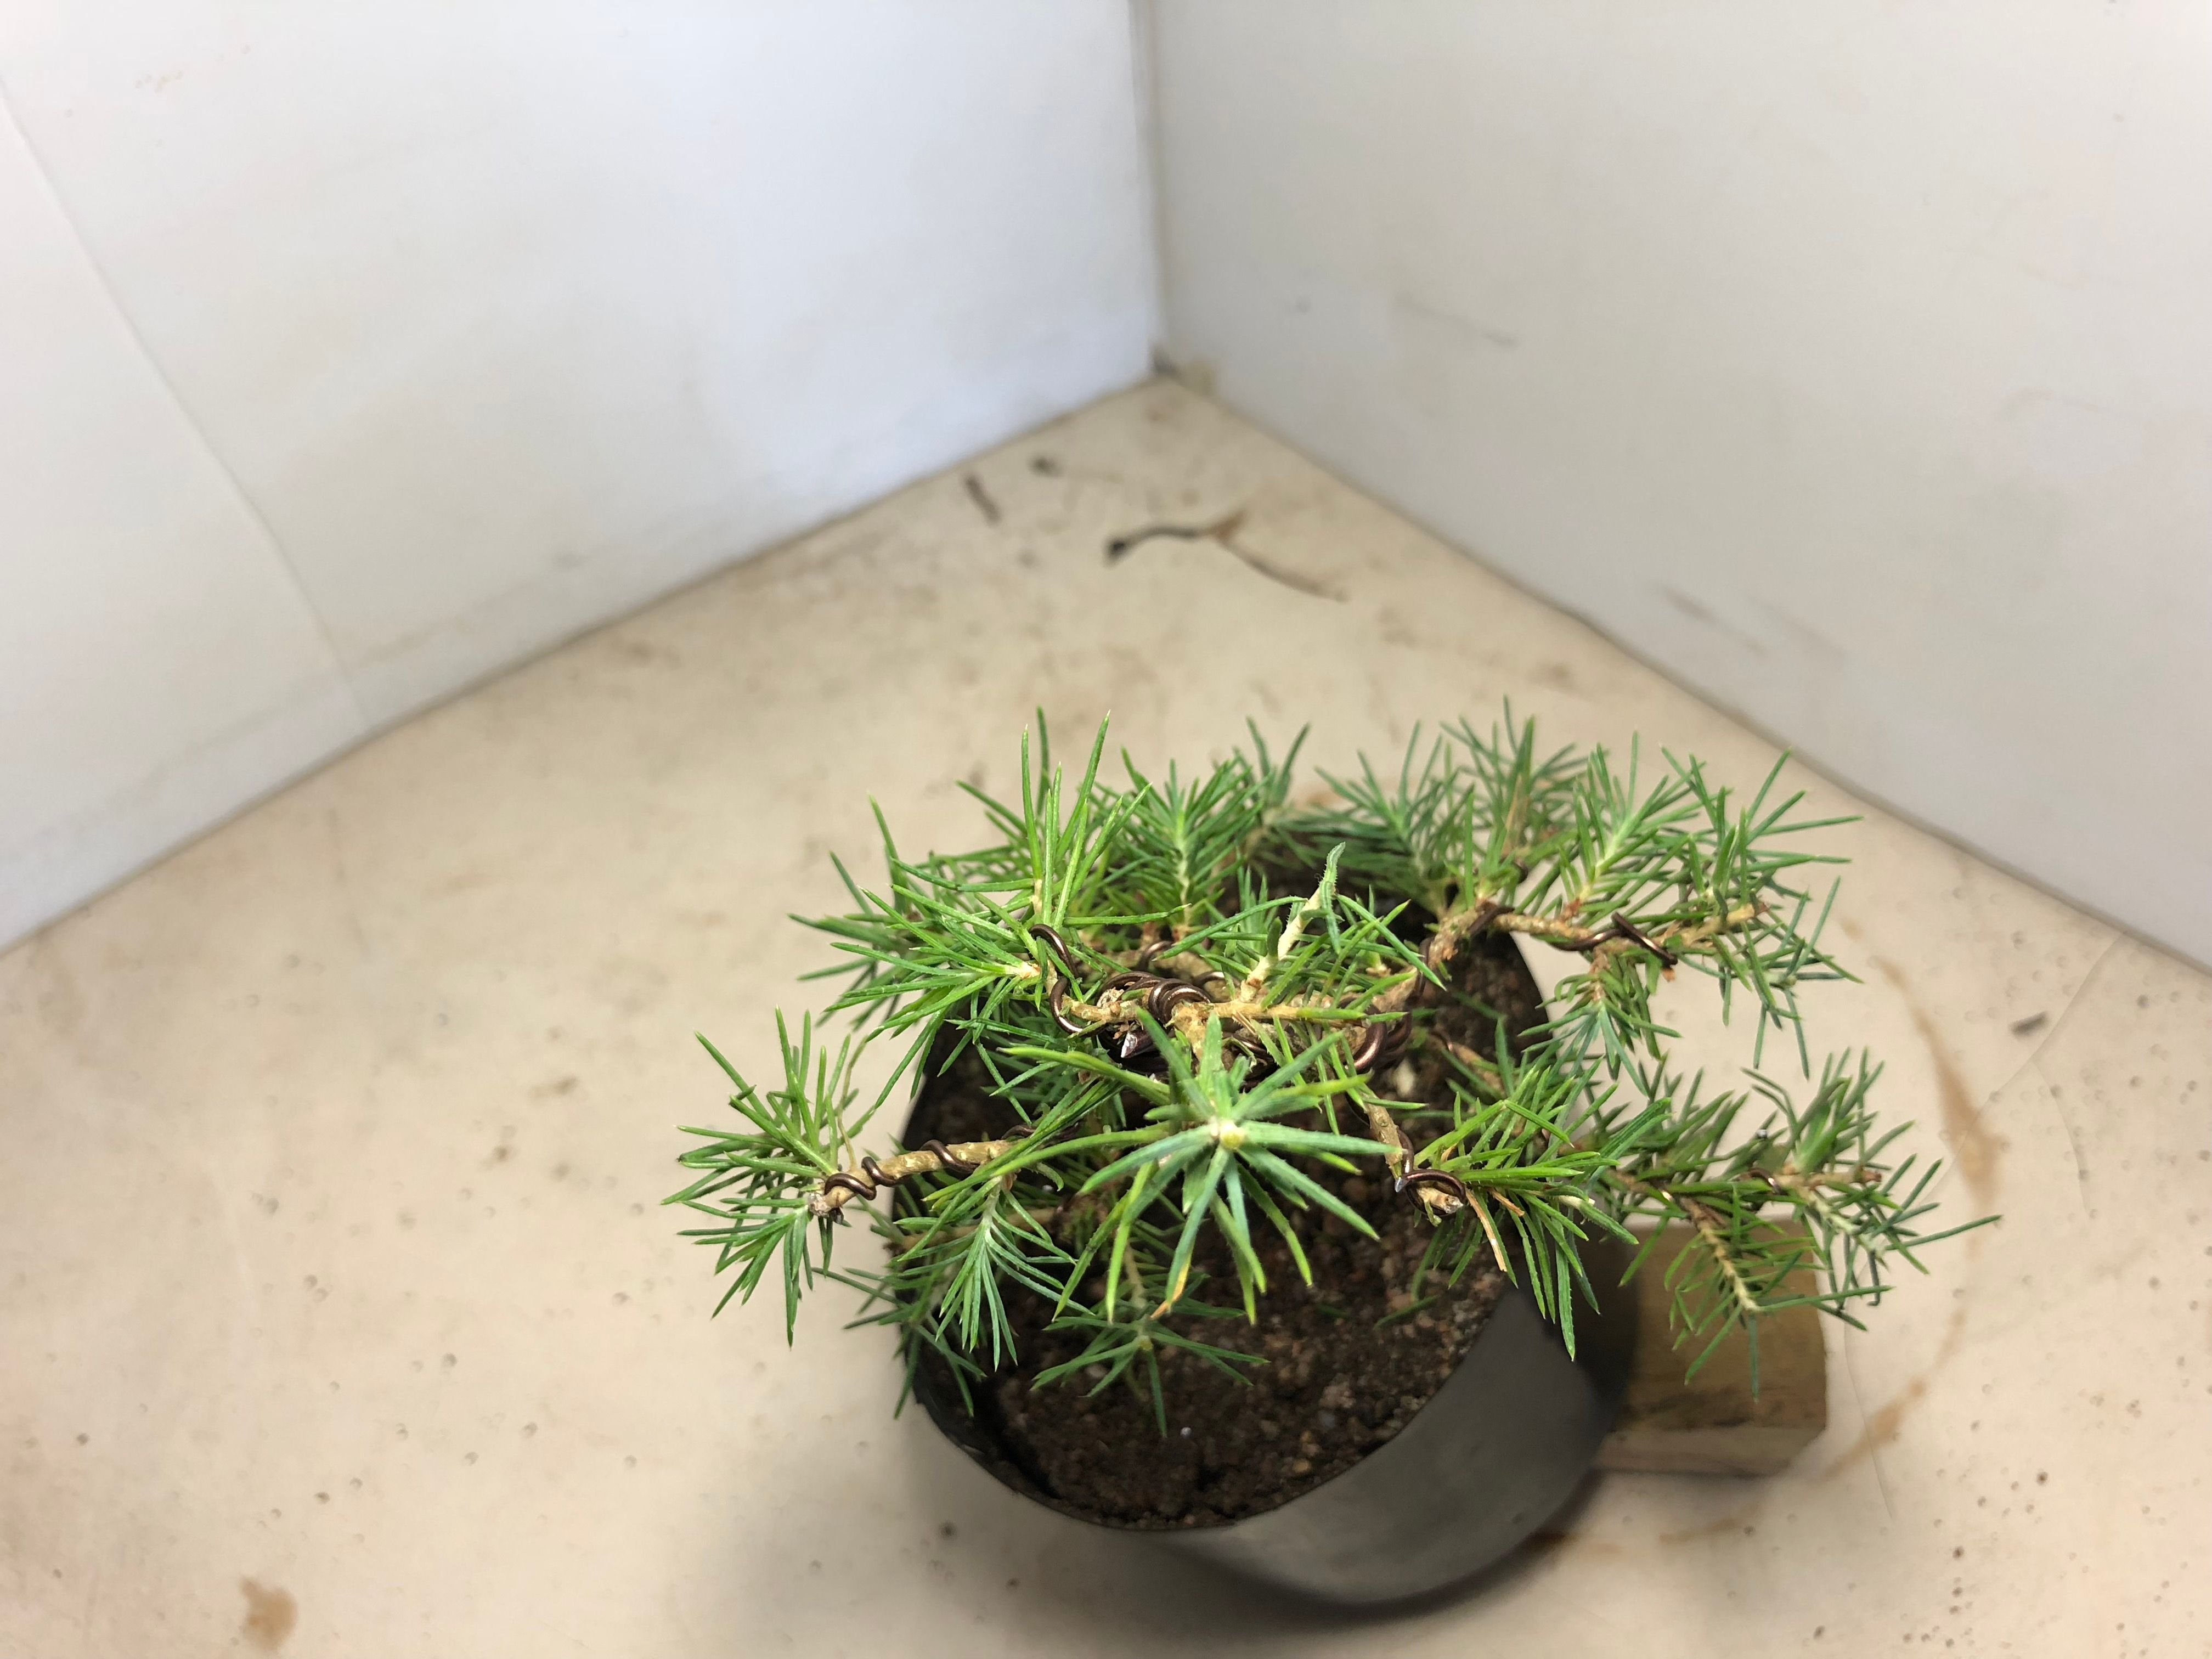
In the photo you can see that the branches do not overlap each other and they form a spiral around the trunk. The reason for this is so that all the branches of the tree get the maximum amount of sunlight. If some of the branches over shadows another the branch will die off.
I can not wait to see what this tree will look like in a year or two. It is always good to style new trees and watch them grow.
Once again thank you for reading. Hope you enjoy this blog. Please feel free to leave your comments below.

Reblogged this on Wolf's Birding and Bonsai Blog.
LikeLike
Reblogged this on Wolf's Birding and Bonsai Blog.
LikeLike